Editing racks and specimens
From Tubetracker
(Redirected from Editing active racks and specimens)
- Administrators have the ability to edit racks and specimens that have already been entered into the system. This is done through the Modify Entered Racks and Specimens feature.
Contents
Opening the Modify Entered Racks and Specimens Screen
- Click Entered Racks in the Navigation Menu under Maintenance.
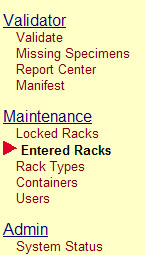 Navigation Menu
Maintenance > Entered Racks - The Modify Entered Racks and Specimens Start Screen will appear. It contains a container list as well as a Rack ID search.
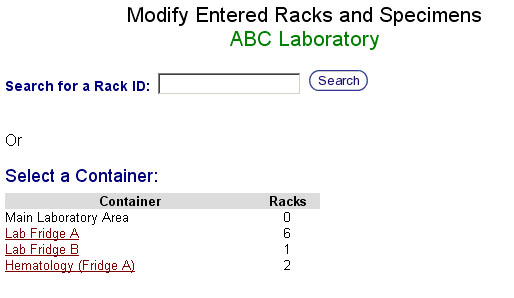 Modify Entered Racks and Specimens Start Screen


Selecting an Entered Rack to Modify
- There are two ways to select a rack to be modified.
- Select a rack through the container list.
- Click the container the rack is stored in.
- A list of racks stored in the selected container will appear.
 Rack Modification Selection Screen
 - Click the Modify button that corresponds to the rack being modified.
- Search for a rack by Rack ID.
- Type or scan a Rack ID into the search box and click the Search button.
- Click on the desired rack in the search results.
 Search Results Screen


- The Rack Modification Screen will appear after a rack is selected using either method.
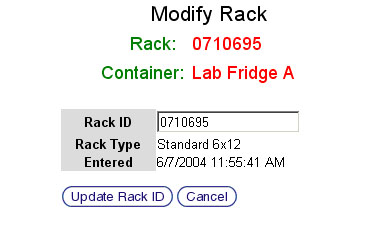 Rack Modification Screen

Modifying an Entered Rack
- Ensure that the correct rack and container have been selected by checking the Rack ID and Container Name listed at the top of the screen in red text. Rack Modification Screen
- Change the Rack ID by deleting the text in the Rack ID text box and typing or scanning a new Rack ID.
- Click the Update Rack button to save the change. Click the Cancel button to return to the Modify Entered Racks and Specimens Start Screen.
- The Rack Modification Confirmation Screen will appear.
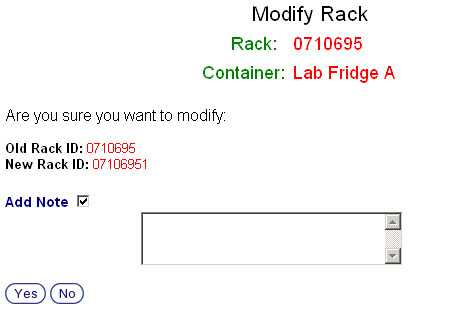 Rack Modification Confirmation Screen
 - Ensure that the New Rack ID that is displayed is correct.
- Add a note, if desired, by clicking the Add Note check box and typing a note into the text box that appears.
- Click the Yes button to confirm the modification. Click the No button to return to the Modify Entered Racks and Specimens Start Screen.

Selecting an Entered Specimen to Modify
- Click on the container in the container listing in which the specimen resides. Modify Entered Racks and Specimens Start Screen
- The Rack Modification Selection Screen will appear. It contains a list of racks stored in the selected container. Rack Modification Selection Screen
- Click the Open button corresponding to the rack in which the specimen resides.
- The Specimen Modification Selection Screen will appear. It contains a list of specimens stored in the selected rack.
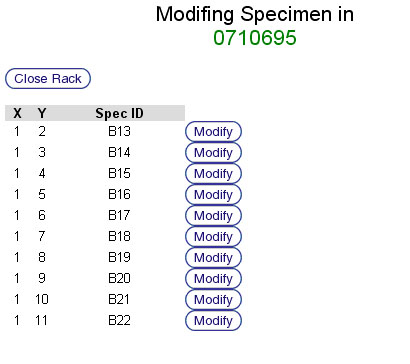 Specimen Modification Selection Screen
 - Click the Modify button corresponding to the specimen being modified.
- The Specimen Modification Screen will appear.
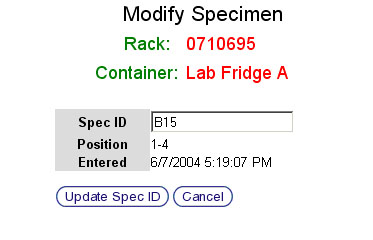 Specimen Modification Screen


Modifying an Entered Specimen
- Ensure that the correct rack and container have been selected by checking the Rack ID and Container Name listed at the top of the screen in red text. Specimen Modification Screen
- Change the Specimen ID by deleting the text in the Spec ID text box and typing or scanning a new Specimen ID.
- Click the Update Spec ID button to save the change. Click the Cancel button to return to the Modify Entered Racks and Specimens Start Screen.
- The Specimen Modification Confirmation Screen will appear.
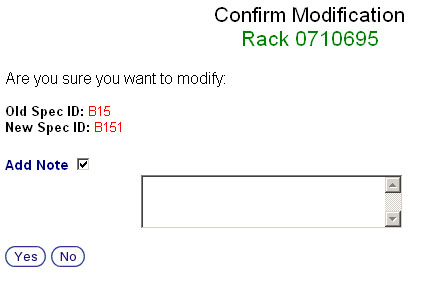 Specimen Modification Confrimation Screen
 - Ensure that the New Specimen ID that is displayed is correct.
- Add a note, if desired, by clicking the Add Note check box and typing a note into the text box that appears.
- Click the Yes button to confirm the modification. Click the No button to return to the Modify Entered Racks and Specimens Start Screen.

Back to the Online Documentation