Discard a rack of specimens
From Tubetracker
With a continuous stream of incoming specimens and a finite amount of storage space, regular racked specimen disposal is a necessity for most normal operations. tube.tracker facilitates this process by allowing users to set an expiration date for racks added to the system. The expiration date allows tube.tracker to generate lists of expired racks that are ready for disposal. Also note that tube.tracker retains specimen information long after the physical specimens have been discarded helping laboratories eliminate the need for cumbersome or inefficient systems of specimen storage.
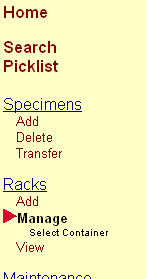
- Click Manage located under Racks in the left navigation area. A container selection page will be displayed.
- Click on a link for a Container to display its expired racks of specimens. Containers that have no racks will not be displayed as a clickable link and will be text. In the example below, Main Laboratory has no racks and so cannot be selected while Lab Fridge A has racks and can be selected.
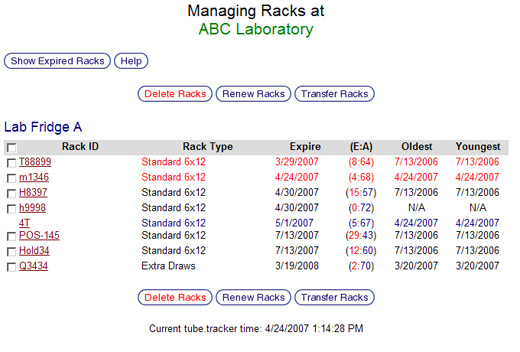
- The Managing Rack page shown below will be displayed. Many rack maintenance functions can be performed from the Managing Racks page including deleting, renewing and transferring racks into another container. Depending on user preference settings, either all racks or just expired racks will be displayed. Racks are sorted by expiration date and the information about each rack, such as Rack Type and Expiration Date, is color coded for quick reference.
- Expired rack's information is displayed in red
- Active rack's information is displayed in black
- Locked rack's information is displayed in blue
- There are two filters for displaying a container's racks called Show All Racks and Show Expired Racks. All of the racks in the example below, with the exception of rack 4T, are expired. Clicking on Show Expired Racks will reload the page filtering out rack 4T. On that page will be a Show All Racks button will reload the page displaying all racks including 4T. For periodic, maintenance rack dumps, it is recommended to display only expired racks.
- The Managing Rack page shown below will be displayed. Many rack maintenance functions can be performed from the Managing Racks page including deleting, renewing and transferring racks into another container. Depending on user preference settings, either all racks or just expired racks will be displayed. Racks are sorted by expiration date and the information about each rack, such as Rack Type and Expiration Date, is color coded for quick reference.
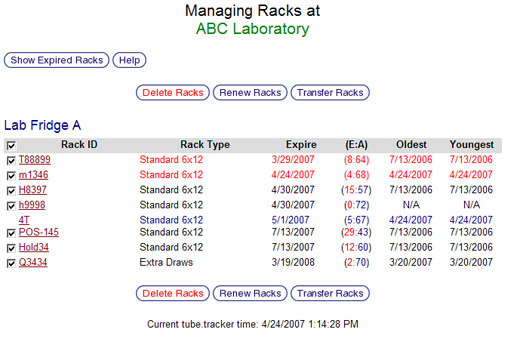
- Click the check boxes to the left of the Rack IDs of racks to be deleted. Select all of the racks by clicking the check box to the left of the Rack ID column heading. If it would be helpful during the physical retrieval of expired racks to have a printed list, print the screen now. Once the racks to be deleted have been selected, click the Delete Racks button.
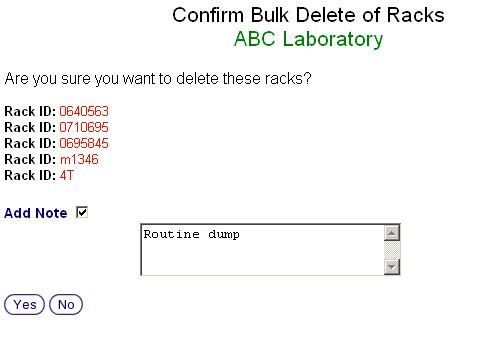
- A confirmation page listing the IDs of racks to be deleted will display. At this point a note can be attached by clicking on the Add Note check box and typing a note into the text box that appears.
- Click Yes to confirm the deletion. Click No to cancel and return to the Managing Racks page.
Back to the Online Documentation


