Difference between revisions of "Locked racks"
From Tubetracker
m (Fixed Image Alignment) |
|||
| Line 1: | Line 1: | ||
| − | : | + | : Administrators will need to handle situations where a user cannot access a rack. The most common reason why a rack cannot be accessed is that it has been locked for editing. Rack locking is a normal safeguard used to prevent two users from working on the same rack which can create a multitude of issues. A rack remains locked indefinitely when a user neither saves nor cancels their changes after working with it and generally either attempts to perform another operation or closes the browser. In this situation, administrators can easily unlock racks from the Locked Racks Screen. |
| − | ''' | + | '''CAUTION: Ensure that no users are working with the rack before unlocking it or they will lose their work.''' |
| + | |||
| + | |||
| + | == Opening the Locked Racks Screen == | ||
| + | |||
| + | # Click on '''Locked Racks''' in the Navigation Menu under '''Maintenance'''.[[image:locked_racks_menu.jpg|none|frame|'''Navigation Menu<br/>Maintenance > Locked Racks''']]<br clear="all" /> | ||
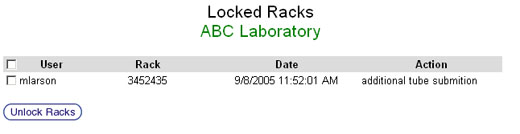
| + | # The Locked Racks screen will appear. This screen displays all currently locked racks.[[image:locked_racks_main.jpg|none|frame|'''Locked Racks Screen''']]<br clear="all" /> | ||
| + | # The table of locked is divided into four columns that display information about each locked rack: | ||
| + | ## '''User''': The user name that locked the rack. | ||
| + | ## '''Rack''': The Rack ID of the locked rack. | ||
| + | ## '''Date''': The date and time that the rack was locked. | ||
| + | ## '''Action''': The operation the user was performing. | ||
| + | |||
| + | |||
| + | == Unlocking a Rack == | ||
| + | |||
| + | # Click on the check box corresponding to the rack to be unlocked. All locked racks can be selected, or unselected, by clicking the check box in the User Column Header. Exercise caution when unlocking all racks since a rack being locked is not always indicative of a problem. Racks are locked when users are accessing them in the course of normal operation, so only unlock racks that are not currently being used. [[image:locked_racks_main.jpg|none|frame|'''Locked Racks Screen''']]<br clear="all" /> | ||
| + | # Click the '''Unlock Racks''' button to unlock the selected racks. | ||
| + | # The Unlock Rack Confirmation Screen will appear. This screen will display a list of Rack IDs for all racks selected to be unlocked.[[image:locked_racks_confirm.jpg|none|frame|'''Unlock Rack Confirmation Screen''']]<br clear="all" /> | ||
| + | # Ensure that only the correct rack or racks have been selected. | ||
| + | # Click the '''Yes''' button to unlock the selected racks. Click the '''No''' button to return to the Locked Racks Screen. | ||
| − | |||
| − | |||
| − | |||
| − | |||
Back to the [[Online Documentation]] | Back to the [[Online Documentation]] | ||
Latest revision as of 17:15, 3 January 2014
- Administrators will need to handle situations where a user cannot access a rack. The most common reason why a rack cannot be accessed is that it has been locked for editing. Rack locking is a normal safeguard used to prevent two users from working on the same rack which can create a multitude of issues. A rack remains locked indefinitely when a user neither saves nor cancels their changes after working with it and generally either attempts to perform another operation or closes the browser. In this situation, administrators can easily unlock racks from the Locked Racks Screen.
CAUTION: Ensure that no users are working with the rack before unlocking it or they will lose their work.
Opening the Locked Racks Screen
- Click on Locked Racks in the Navigation Menu under Maintenance.
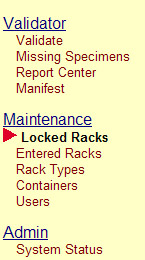 Navigation Menu
Maintenance > Locked Racks - The Locked Racks screen will appear. This screen displays all currently locked racks.
 Locked Racks Screen
 - The table of locked is divided into four columns that display information about each locked rack:
- User: The user name that locked the rack.
- Rack: The Rack ID of the locked rack.
- Date: The date and time that the rack was locked.
- Action: The operation the user was performing.


Unlocking a Rack
- Click on the check box corresponding to the rack to be unlocked. All locked racks can be selected, or unselected, by clicking the check box in the User Column Header. Exercise caution when unlocking all racks since a rack being locked is not always indicative of a problem. Racks are locked when users are accessing them in the course of normal operation, so only unlock racks that are not currently being used. Locked Racks Screen
- Click the Unlock Racks button to unlock the selected racks.
- The Unlock Rack Confirmation Screen will appear. This screen will display a list of Rack IDs for all racks selected to be unlocked.
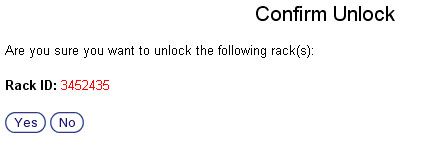 Unlock Rack Confirmation Screen
 - Ensure that only the correct rack or racks have been selected.
- Click the Yes button to unlock the selected racks. Click the No button to return to the Locked Racks Screen.

Back to the Online Documentation