Manifest
From Tubetracker
- The manifest is a useful tool that will display a printable list of specimens from a rack or container. This manifest printout can then be sent along with the rack or container for use in validation.
- Click Manifest in the left-hand menu under the heading Validation.
 Manifest menu
 - The Container Selection screen will then appear. Select a container from this screen by clicking on its name.
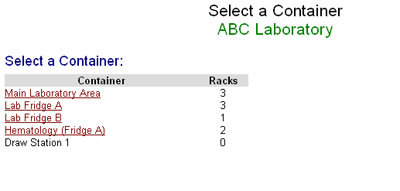 Manifest select container screen
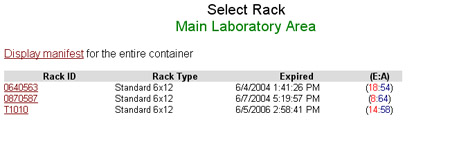
 - Clicking on the container name will bring up the Rack Selection screen. From this screen you can either produce a manifest for all racks residing in this container, or you can select a rack to produce a manifest for just that rack.
 Manifest select rack screen
- Print a container manifest: Click the display manifest for the entire container link at the top of the page.
 Container Manifest
 - Print a rack manifest: Click the name of the rack for which a manifest is to be printed.
 Rack Manifest
- Print a container manifest: Click the display manifest for the entire container link at the top of the page.
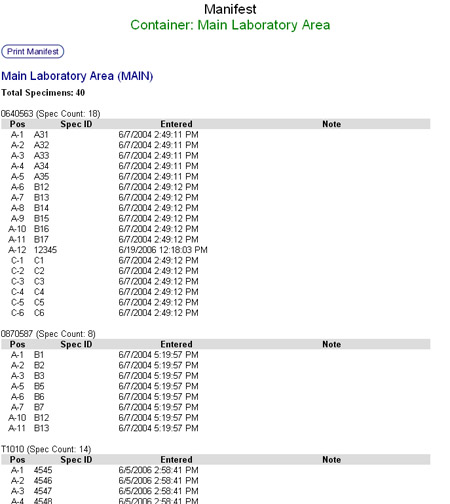
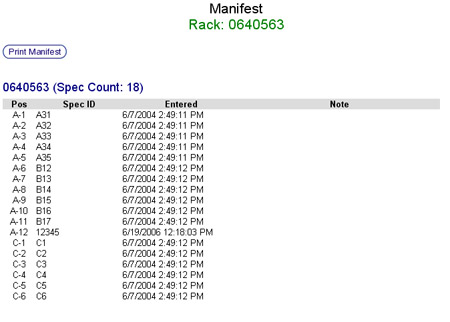
- The manifest screen is now displayed. If a container was selected, all racks and specimens residing in the container will be displayed. If a rack was selected, only the specimens contained in the rack will be displayed.
- The specimen listing display four columns of information:
- Rack Position: Displays the position in the rack where the specimen resides.
- Spec ID: Displays the specimen ID of the specimen.
- Entered: Displays the date and time when the specimen was entered into the rack.
- Note: Displays any note attached to the specimen during entry.
- To print this manifest, click the Print Manifest button at the top of the page. This will open a new window, display a printer friendly version of the manifest and prompt you to pick a printer destination.


Back to the Online Documentation