Difference between revisions of "Setting Institution Wide Defaults and Defaults for New Users"
From Tubetracker
m (Setting the account specific options for you lab moved to Setting the account specific options for your lab: misspelling) |
|||
| Line 1: | Line 1: | ||
| − | tube.tracker® has the ability to customize certain settings for your institution. In addition to unique instituion options, you can also specify default settings for new user accounts. This allows an administrator to quickly add a new user account and then, if that account deserves special consideration, to modify them later. | + | :tube.tracker® has the ability to customize certain settings for your institution. In addition to unique instituion options, you can also specify default settings for new user accounts. This allows an administrator to quickly add a new user account and then, if that account deserves special consideration, to modify them later. |
| − | + | ||
| − | + | # Click '''Users''' under the '''Maintenance''' heading in the left-hand menu.[[image:manage_user_menu.jpg|left|frame|'''Mange users menu''']]<br clear="all" /> | |
| − | + | # This will display the manage users screen.[[image:manage_user_account_listing.jpg|left|frame|'''Manage user accounts main screen''']]<br clear="all" /> | |
| − | + | # Click linked text at the top of the page that reads '''Default options for your institution and new users'''. This link will take you to the institution and default user options screen.[[image:institution_options.jpg|left|frame|'''Institutions options screen''']]<br clear="all" /> | |
| − | + | # The following is a descriptions of each of the available settings: | |
| − | + | ## Default user options | |
| − | + | ##* ''Default Container'': The container that is automatically selected when creating a new rack. | |
| − | + | ##* ''Default Rack Type'': The rack type that is automatically selected when creating a new rack. | |
| − | + | ##* ''Default Expire Date'': The expire date in number of days of new racks. | |
| − | + | ##* ''Show expired racks by default'': Determines the default rack view when entering the Manage Rack area. | |
| − | + | ##* ''Force container selection'': Forces a user to manually select a destination container no matter what is stored in the default container setting. | |
| − | + | ##* ''Use container capacity'': Enables container capacity checking when creating new racks. | |
| − | + | ## Institution options | |
| − | + | ##* ''Use letter designator'': Determines the X axis heading when viewing a graphical representation of a rack. By default, the X-axis is labled with numbers. Enabling this setting will convert the number into letters. | |
| − | + | ##* ''Renew rack on spec enter'': This setting will enable the automatic rack renewal feature of tube.tracker®. If this setting is enabled, entering a new specimen into an existing rack will automatically renew the rack. The number of days used to renew the rack is taken from the '''Expire Time''' value of the container in which the rack resides. | |
| − | + | # If you have made a change to any of the settings on this page, click the <b>Update Options</b> button to apply the new settings. | |
| − | |||
| − | |||
| − | |||
| − | |||
| − | |||
| − | |||
| − | |||
| − | |||
| − | |||
| − | |||
Back to the [[Online Documentation]] | Back to the [[Online Documentation]] | ||
Revision as of 21:13, 19 December 2007
- tube.tracker® has the ability to customize certain settings for your institution. In addition to unique instituion options, you can also specify default settings for new user accounts. This allows an administrator to quickly add a new user account and then, if that account deserves special consideration, to modify them later.
- Click Users under the Maintenance heading in the left-hand menu.
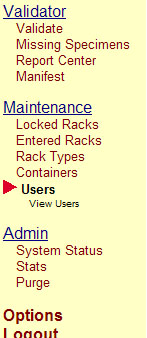 Mange users menu
 - This will display the manage users screen.
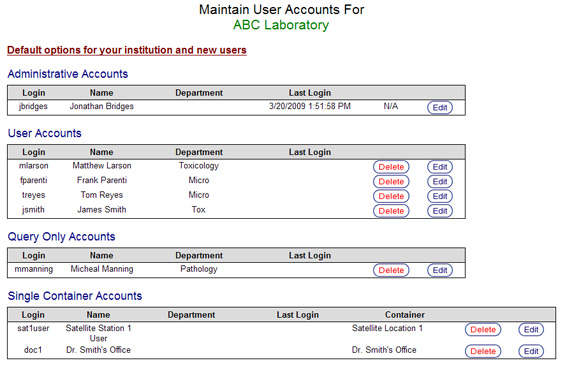 Manage user accounts main screen
 - Click linked text at the top of the page that reads Default options for your institution and new users. This link will take you to the institution and default user options screen.
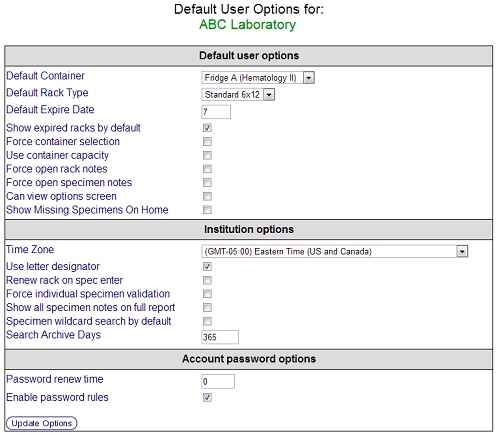 Institutions options screen
 - The following is a descriptions of each of the available settings:
- Default user options
- Default Container: The container that is automatically selected when creating a new rack.
- Default Rack Type: The rack type that is automatically selected when creating a new rack.
- Default Expire Date: The expire date in number of days of new racks.
- Show expired racks by default: Determines the default rack view when entering the Manage Rack area.
- Force container selection: Forces a user to manually select a destination container no matter what is stored in the default container setting.
- Use container capacity: Enables container capacity checking when creating new racks.
- Institution options
- Use letter designator: Determines the X axis heading when viewing a graphical representation of a rack. By default, the X-axis is labled with numbers. Enabling this setting will convert the number into letters.
- Renew rack on spec enter: This setting will enable the automatic rack renewal feature of tube.tracker®. If this setting is enabled, entering a new specimen into an existing rack will automatically renew the rack. The number of days used to renew the rack is taken from the Expire Time value of the container in which the rack resides.
- Default user options
- If you have made a change to any of the settings on this page, click the Update Options button to apply the new settings.


Back to the Online Documentation