Difference between revisions of "Purging archived specimens from the system"
From Tubetracker
m (Fixed Image Alignment) |
|||
| Line 1: | Line 1: | ||
| − | :There may come a time when it will be necessary to purge the database of | + | : There may come a time when it will be necessary to purge the database of archived specimens. This service is especially useful to institutions that must recycle a limited number of Specimen IDs. |
| + | |||
| + | |||
| + | == Opening the Record Purging Screen == | ||
| + | |||
| + | # Click '''Purge''' in the Navigation Menu under '''Admin'''.[[image:purge_menu.jpg|none|frame|'''Navigation Menu<br/>Admin > Purge''']]<br clear="all" /> | ||
| + | # The Record Purging Screen will appear. This screen allows a date range to be specified for purging. It also allows a mailing address to be entered where the purging data can be mailed if desired.[[image:purge_main.jpg|none|frame|'''Record Purging Screen''']]<br clear="all" /> | ||
| + | |||
| + | |||
| + | == Requesting a Record Purge == | ||
| + | |||
| + | # Enter a range of dates in which records will be purged. | ||
| + | ## Enter the beginning date of the range in the Begin Date text box, or leave it empty to purge all of the oldest available specimens. | ||
| + | ## Enter the ending date of the range in the End Date text box. | ||
| + | # Click the check box next to ''I would like a copy of the data'' if a copy of the purged data is needed and enter the mailing address to which a copy of the data will be sent. | ||
| + | # Include any special instructions for the purge in the Special Instructions text box. | ||
| + | # Click the '''Request Purge''' button to submit the request. | ||
| − | |||
| − | |||
| − | |||
| − | |||
| − | |||
| − | |||
Back to the [[Online Documentation]] | Back to the [[Online Documentation]] | ||
Latest revision as of 17:37, 3 January 2014
- There may come a time when it will be necessary to purge the database of archived specimens. This service is especially useful to institutions that must recycle a limited number of Specimen IDs.
Opening the Record Purging Screen
- Click Purge in the Navigation Menu under Admin.
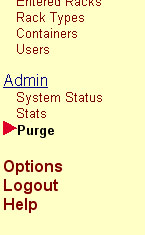 Navigation Menu
Admin > Purge - The Record Purging Screen will appear. This screen allows a date range to be specified for purging. It also allows a mailing address to be entered where the purging data can be mailed if desired.
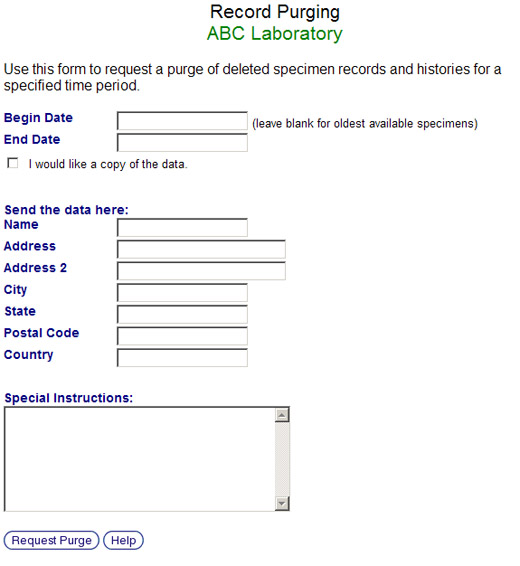 Record Purging Screen


Requesting a Record Purge
- Enter a range of dates in which records will be purged.
- Enter the beginning date of the range in the Begin Date text box, or leave it empty to purge all of the oldest available specimens.
- Enter the ending date of the range in the End Date text box.
- Click the check box next to I would like a copy of the data if a copy of the purged data is needed and enter the mailing address to which a copy of the data will be sent.
- Include any special instructions for the purge in the Special Instructions text box.
- Click the Request Purge button to submit the request.
Back to the Online Documentation