Using the picklist
From Tubetracker
Each user account in tube.tracker has its own picklist which can be utilized to streamline the workflow of certain procedures.
Contents
Adding specimens to the picklist
- Use the steps described in Searching for a specimen to locate the desired specimen.
- Click the Add button in the Picklist column that corresponds to the Specimen ID of the desired specimen.
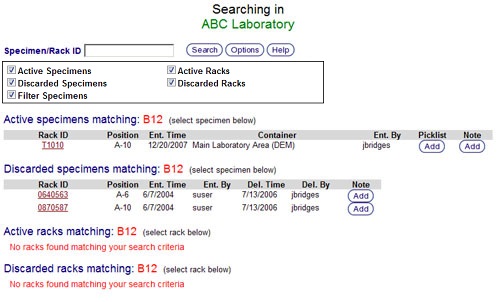 Specimen search results
 - Repeat steps 1 & 2 as necessary until all desired specimens have been selected using this method.

Viewing the picklist
- Click Picklist in the Navigation Menu to display the Picklist screen.
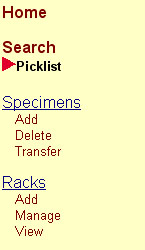 Navigation Menu
Picklist
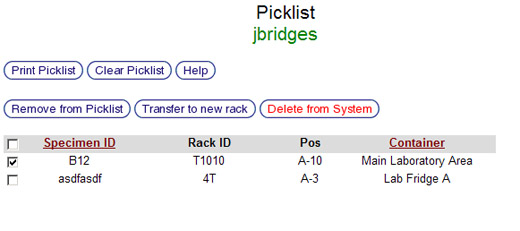
- The Picklist screen serves multiple purposes by both displaying the current picklist and providing a jumping-off point for many other operations.
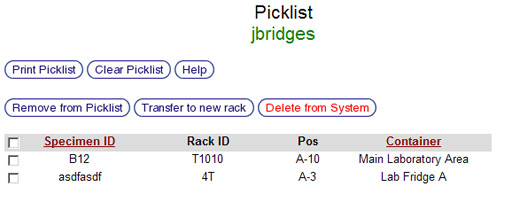 Picklist
Main Screen - The picklist can be sorted alphabetically by either Specimen ID or Container by clicking on the corresponding column header. To sort by either in reverse alphabetical order, click the corresponding column header a second time.
- The Picklist screen serves multiple purposes by both displaying the current picklist and providing a jumping-off point for many other operations.


Printing the picklist
- Click on the Print Picklist button to create a new browser window or tab displaying a printer-friendly version of the picklist.
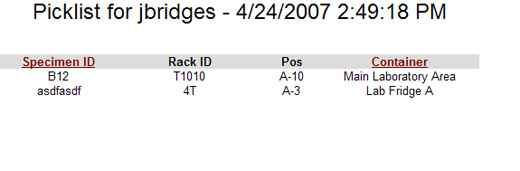 Picklist print screen
 - Click File and then click Print or press Ctrl+P in this new window to select the desired printer and click Print or OK depending on the browser to begin printing.
- After the picklist has been printed, it is safe to close this browser window or tab.

Removing specimens from the picklist
- Click the check boxes corresponding to the specimens to be removed from the picklist or click the check box in the column header to select and deselect all specimens.
 Remove from picklist
 - Click the Remove from Picklist button to proceed to the confirmation screen.
 Remove from picklist confirmation screen
 - Review the specimens selected for removal from the picklist and click the Yes button to remove the selected specimen(s) from the picklist. If the wrong specimens were selcted, click the No button. Clicking either button will return to the Main Picklist screen.


== Clearing the Picklist
- Click the Clear Picklist button
Remove specimen from the system
In addition to the normal procedure for deleting specimen from an existing rack, specimens can be deleted from the system using a picklist.
- Click the check boxes corresponding to the specimens to be deleted from the system or click the check box in the column header to select and deselect all specimens. Remove from picklist
- Click the Delete from System button to display the confirmation screen.
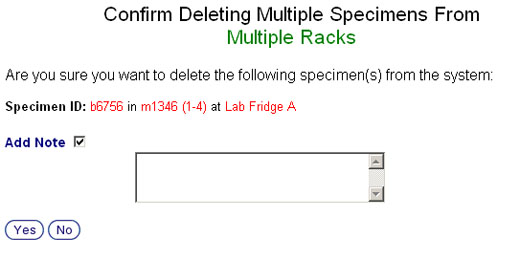 Picklist delete from system confirmation screen
 - Attach a note to this event, if desired, by clicking the Add Note check box and typing the note into text box that appears.
- Review the specimens selected for deletion from the system:
- Click the Yes button to remove the selected specimen(s) from the picklist if the correct specimens have been selected.
- Click the No button if an incorrect specimen has been selected.
- Clicking either button will return to the Main Picklist screen.

Transfer to a new rack
Picklists are a simple way to transfer specimens to a new rack as opposed to manually creating a new rack and then transferring each specimen individually.
- Click the check boxes corresponding to the specimens to be transferred to a new rack or click the check box in the column header to select and deselect all specimens. Remove from picklist
- Click the Transfer to new rack button to bring up the Picklist Transfer screen.
 Picklist transfer specimens to new rack main screen
 - Select the container in which the new rack will be stored, the type of rack to be used, and enter the rack ID of the new rack.
- Click the Add Note check box to attach a note to this event.
- Click Add Rack to bring up the transfer confirmation screen.
Picklist transfer specimens to new rack confirmation screen
- The transfer confirmation screen has several sections:
- New Rack Information displays the Container, Rack Type, Rack ID, and any Notes for the new rack.
- Specimen(s) to transfer displays the Specimen ID, Source Rack and Position in Rack, Destination position in the new rack.
- Clear specimen(s) from picklist after transfer check box provides the option to clear all of the specimens involved in the transfer from the picklist. Leave this check box unchecked if the specimens should remain in the picklist to perform another function.
- Click the Transfer Specimen button to finalize the transfer or click the Cancel Transfer button to cancel it.
Back to the Online Documentation