Edit an existing rack
Selecting an Entered Rack to Modify
There are two ways to select a rack to be modified.
- Select a rack through the container list.
- Click the container the rack is stored in.
- A list of racks stored in the selected container will appear.

- Click the Modify button that corresponds to the rack being modified.
- Search for a rack by Rack ID.
- Type or scan a Rack ID into the search box and click the Search button.
- Click on the desired rack in the search results.

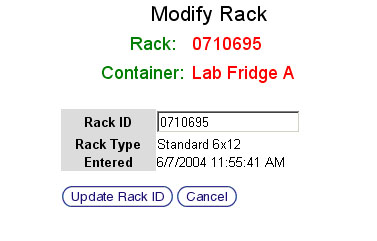
- The Rack Modification Screen will appear after a rack is selected using either method.

Modifying an Entered Rack
- Ensure that the correct rack and container have been selected by checking the Rack ID and Container Name listed at the top of the screen in red text.

- Change the Rack ID by deleting the text in the Rack ID text box and typing or scanning a new Rack ID.
- Click the Update Rack button to save the change. Click the Cancel button to return to the Modify Entered Racks and Specimens Start Screen.
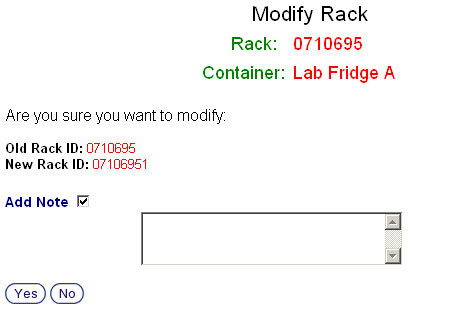
- The Rack Modification Confirmation Screen will appear.

- Ensure that the New Rack ID that is displayed is correct.
- Add a note, if desired, by clicking the Add Note check box and typing a note into the text box that appears.
- Click the Yes button to confirm the modification. Click the No button to return to the Modify Entered Racks and Specimens Start Screen.