Edit an existing specimen
Selecting an Entered Specimen to Modify
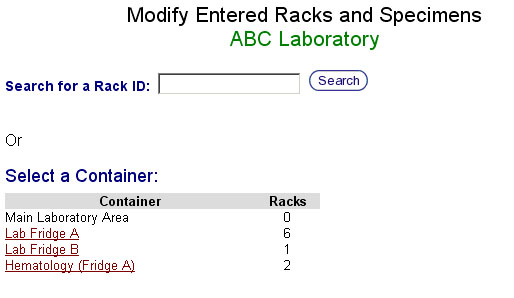
- Click on the container in the container listing in which the specimen resides.
- The Rack Modification Selection Screen will appear. It contains a list of racks stored in the selected container.
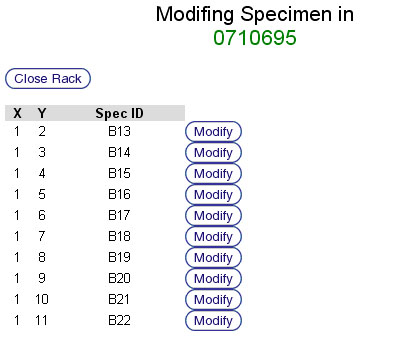
- Click the Open button corresponding to the rack in which the specimen resides.
- The Specimen Modification Selection Screen will appear. It contains a list of specimens stored in the selected rack.
- Click the Modify button corresponding to the specimen being modified.
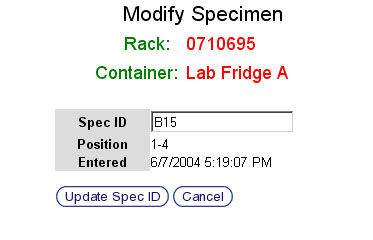
- The Specimen Modification Screen will appear.
[[image:edit_rack_spec_modify_spec_main.jpg|none|frame|Specimen Modification Screen]]
Modifying an Entered Specimen
- Ensure that the correct rack and container have been selected by checking the Rack ID and Container Name listed at the top of the screen in red text.
- Change the Specimen ID by deleting the text in the Spec ID text box and typing or scanning a new Specimen ID.
- Click the Update Spec ID button to save the change. Click the Cancel button to return to the Modify Entered Racks and Specimens Start Screen.
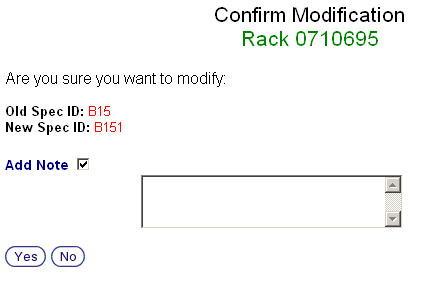
- The Specimen Modification Confirmation Screen will appear.
- Ensure that the New Specimen ID that is displayed is correct.
- Add a note, if desired, by clicking the Add Note check box and typing a note into the text box that appears.
- Click the Yes button to confirm the modification. Click the No button to return to the Modify Entered Racks and Specimens Start Screen.


